I never made a mobile for Beatrice — it was one of those things like eating organic that I assumed of course I’d do before I got pregnant that I never got around to once I was actually pregnant. So Baby #2, you are winning in the mobile department! Take that, second child syndrome.
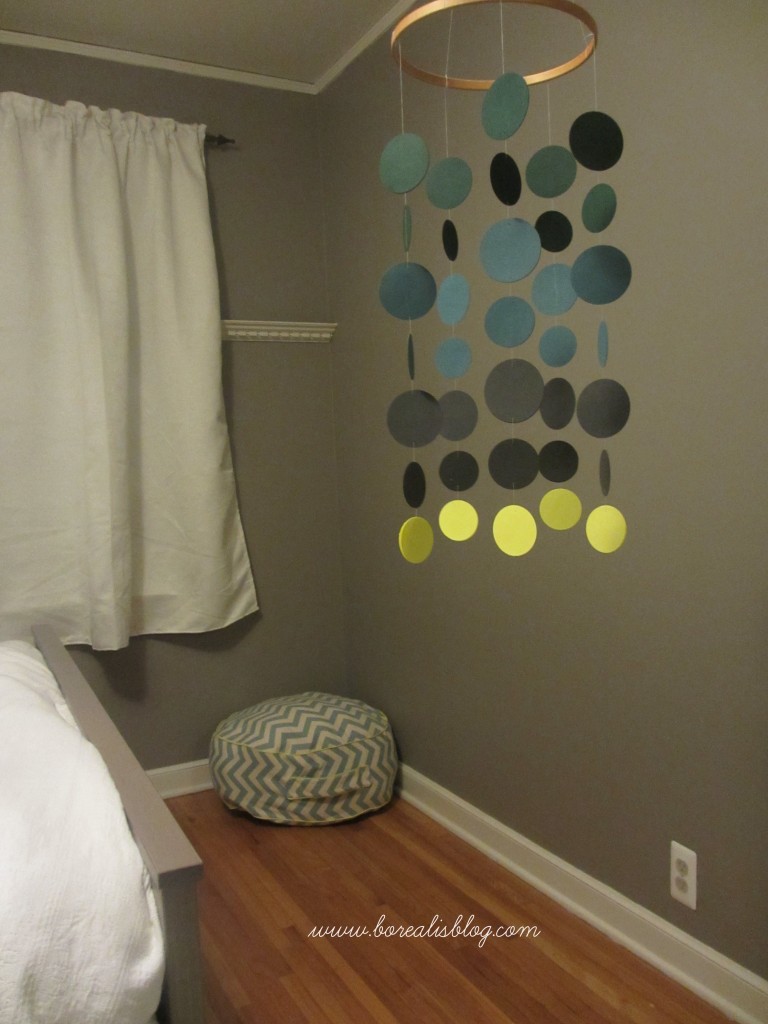
I loved the simplicity of the modern nursery mobile that Everything Designish created, so I made a trip to the craft store last week and then invited myself along to one of Jen and Kristen’s famous craft days. After a little deliberating I settled on a dark teal, medium blue, gray, and bright (almost neon) yellow. This isn’t the palette for the room necessarily, but I liked how the darker moody colors looked.
Will a magical mesmerizing mobile help Baby #2 turn into a great sleeper? Let’s hope so!
Supplies
3 sheets cardstock, in four different colors
Circle punches in the 2-inch and 2.5-inch size (Ask around to your crafty friends to see if you can borrow them! Other sizes would work too.)
Hole punch in a very small size (preferred) or a sewing needle to poke holes
Clear jewelry thread
Glue of choice (I went with a plain old glue stick, but if you want an excuse to fire up the glue gun, go for it!)
Wooden embroidery hoop, 9-inch size. You’ll only need the inner loop (the one without the clamp), if you want to save the outer loop for another project.
How to make a modern nursery mobile
1. Decide on your colors. Punch 10 large circles and 10 small circles out of three of the colors. From the remaining color, punch 10 small circles. As long as you’re punching, punch a few extras in case you make mistakes. The mobile has 5 strands of 7 circles each (3 large size, 4 small size). Each circle is actually a sandwich of two circles, so you need two circles to make each finished circle.
2. For each stack of 10 circles (except for the bottom one, yellow in my case), pull out 5 circles and punch a small hole in the top and bottom of the circle. You’ll use this to thread the string through the circles. You’ll use the 5 other circles that you don’t hole punch to make sandwiches with the punched circles (hiding the thread in between).
For the bottom (yellow) circle, punch just one hole because it’s at the bottom and only connects to the circle above it. If you get punch happy and double punch the yellow circle, no worries because I accidentally did that and it really doesn’t matter (and you know who cares the least? Baby.)
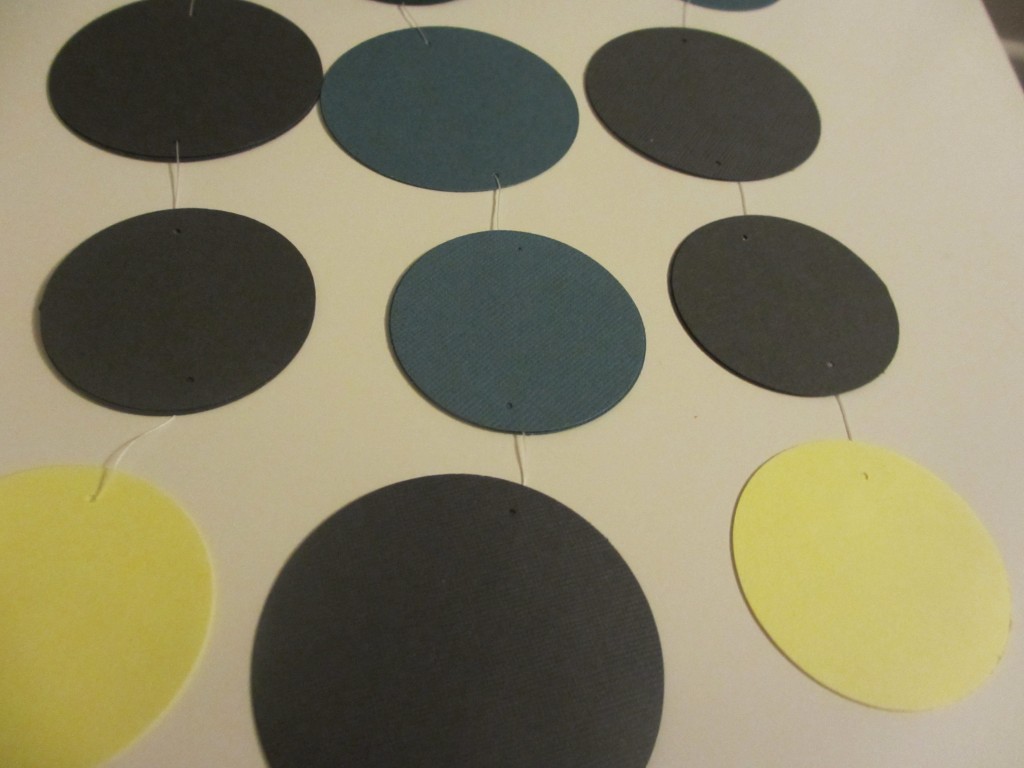
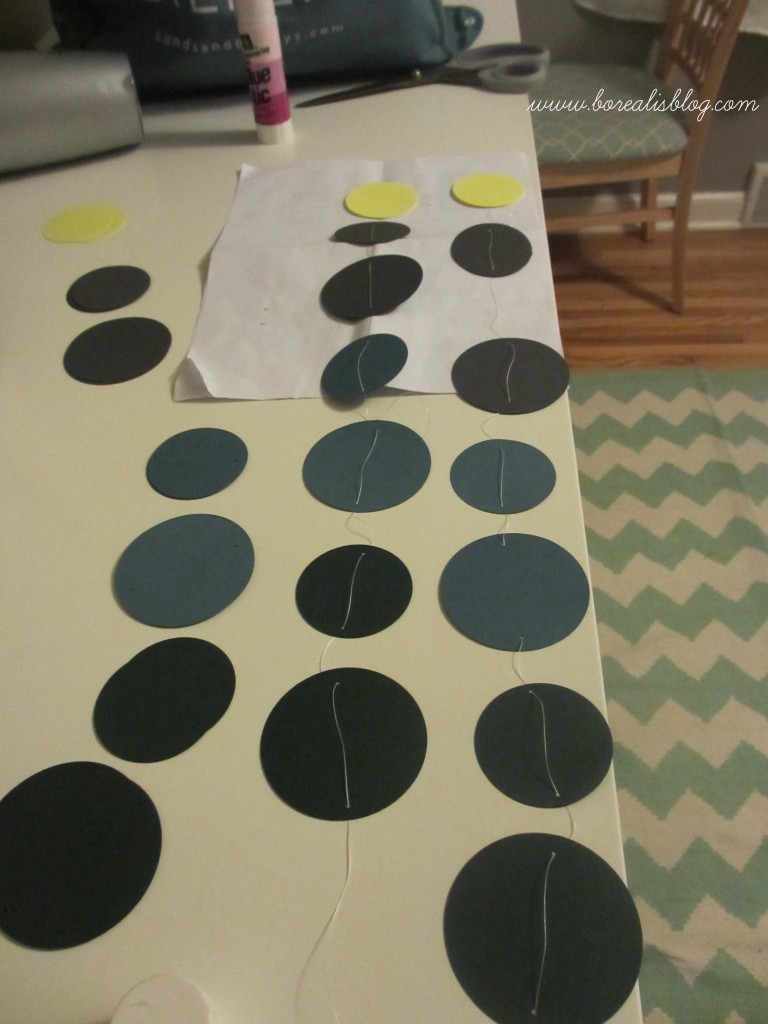
3. Lay out one set of hole-punched circles in a line. Thread the string through the circles, as if stringing them for a bead bracelet. When you’re done, make sure you can see the thread going across each circle, and that one hasn’t accidentally flipped over as you’ve worked. (Like on the picture above, one of the big blue circles is flipped.)
Confession: I completed 3 of the 5 strands while chatting with Jen and Kristen at craft day. When I pulled the project out to finish up the last 2 strands I noticed I must have been too busy chatting, because several of my circles had gotten flipped and the thread was not sandwiched between the two circles. I had a few spare circles so I glued a third circle on to fix some, but the others I had to just let go. Oops!
4. Starting with the bottom yellow circle, glue another yellow circle on top, making a sandwich and concealing most of the thread in between the circles. Repeat with the rest of the circles, anchoring your set of circles by topping them with matching circles glued in place, hiding the thread. When you’ve finished a strand, press it under something heavy to make sure your circles are stuck together well. Continue until you have all five strands.
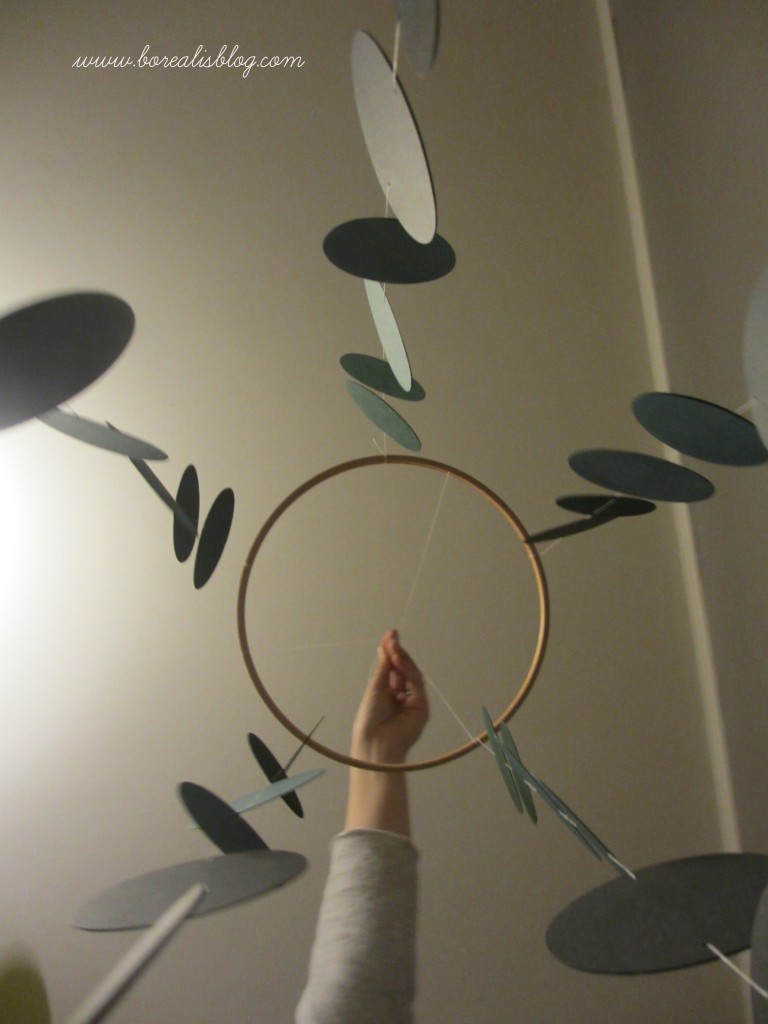
5. To assemble the mobile, first tie three strands of jewelry thread to the hoop and gather them together above the hoop, so you can suspend the hoop from something as you attach the strands. Then carefully attach each strand.
So there you have it! One modern nursery mobile. Now just to figure out where in the room to hang it…
Update
Now that the baby is here, I’m happy to report that she is fascinated by the model. The neon-ish yellow of the bottom circles seems in particular to catch her attention. Also — and this is my favorite part — we have a space heater in the room near the mobile and it makes the mobile spin dreamily. Bonus!


